How To Airdrop On A Mac

So, there I was, sitting at my Mac, trying to figure out how to send a file to my friend's iPhone. I mean, come on, it's not like I was asking for the secret to cold fusion, r...
So, there I was, sitting at my Mac, trying to figure out how to send a file to my friend's iPhone. I mean, come on, it's not like I was asking for the secret to cold fusion, right? Turns out, Apple's got this nifty little feature called AirDrop, and it's as easy as pie. Well, maybe not as easy as pie, but you get the drift.
What's AirDrop, you ask?
Alright, let's back up a bit. AirDrop is like Apple's version of a file-sharing service, but instead of using the cloud or some other fancy-schmancy technology, it uses Bluetooth and Wi-Fi to send files directly from one Apple device to another. No cables, no hassle, just point and shoot. Well, not literally, but you get the idea.
Why use AirDrop?
You might be thinking, "Why would I want to use AirDrop when I can just email the file or use some other sharing service?" Well, my friend, AirDrop has a few tricks up its sleeve. For one, it's super fast. I mean, we're talking seconds here, not minutes. Plus, it's incredibly convenient. No need to sign in to this account or that service, just turn it on and you're good to go.
Must Read
And the best part? It's secure. AirDrop uses encryption to protect your files, and you have to approve every transfer, so you don't have to worry about some random stranger snatching your files. It's like having a secret handshake, but with your Mac.
Alright, enough chit-chat, let's get to the point.
You're here because you want to know how to use AirDrop on your Mac, right? Well, buckle up, because here we go.
How to AirDrop on a Mac
Step 1: Turn on AirDrop
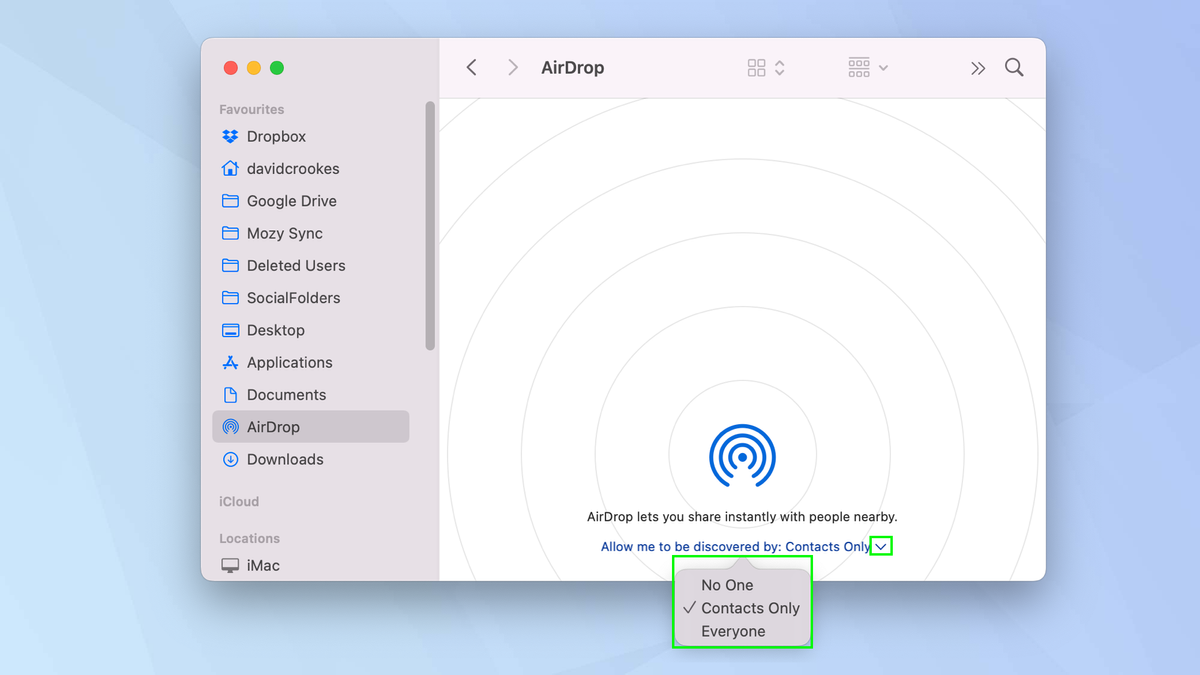
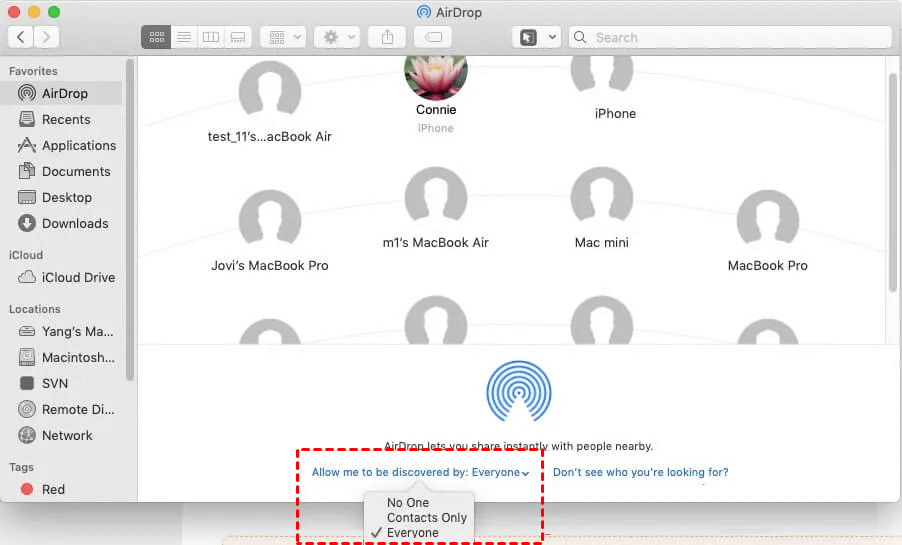
First things first, you need to turn on AirDrop. You can do this by going to the Finder menu and clicking on "Go" then "AirDrop". Alternatively, you can use Spotlight Search by pressing Command + Space, then typing "AirDrop". Once you're in the AirDrop window, you'll see a blue bar at the bottom that says "Don't receive items" or "Allow me to be discovered by". Click on the latter to turn AirDrop on.
 Top 10 Ways to Transfer Files from Mac to Mac
Step 2: Make your Mac discoverable
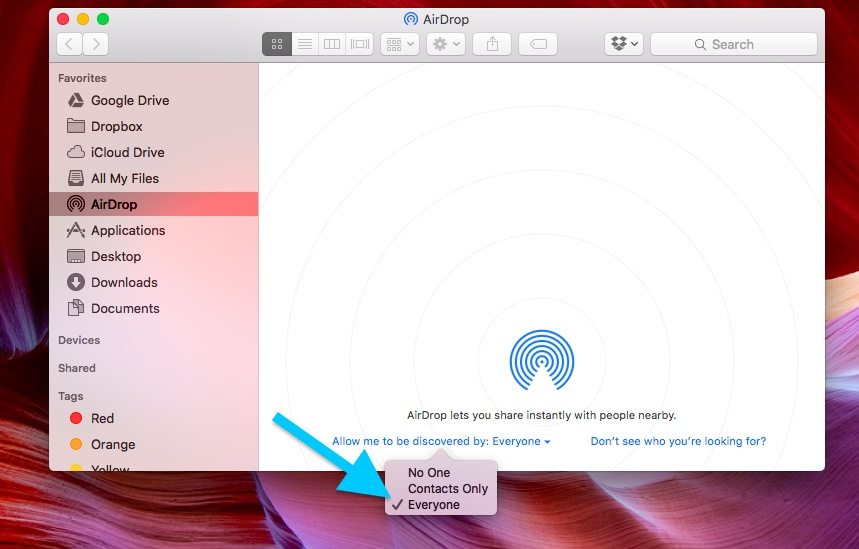
Now, you want to make sure your Mac is discoverable by other devices. By default, your Mac is set to only receive items from people in your Contacts. If you want to receive items from anyone, click on "Allow me to be discovered by" and select "Everyone". But be careful, this means anyone nearby can send you files, so keep an eye out for any unwanted gifts.
Step 3: Send a file
Alright, now comes the fun part. Sending a file with AirDrop is as simple as drag and drop. Just select the file you want to send, drag it into the AirDrop window, and wait for the magic to happen. Your Mac will search for nearby devices, and you should see your friend's iPhone pop up in the window.
Once you see their device, just drop the file onto it. If they have AirDrop turned on and their device is set to receive items from anyone (or you're in their Contacts), the file should start transferring immediately. You'll see a progress bar in the AirDrop window, and once it's done, you'll get a notification.
 How to AirDrop on a Mac - Complete Tutorial with Images
Step 4: Receive a file
Now, let's say your friend wants to send you a file. When they drop the file onto your Mac in the AirDrop window, you'll get a notification asking if you want to accept the file. Click "Accept" and the file will start downloading. If you change your mind, you can click "Decline".
And that's it!
See, I told you it was easy. Now you can send and receive files like a pro. Just remember, AirDrop only works with devices that are nearby and have AirDrop turned on. So, don't try to send a file to your friend across town, it's not going to work. Trust me, I've tried.
So, go forth and AirDrop, my friend. Share those photos, send those documents, and make your life a little bit easier. And if you have any other tech questions, just let me know. I'm always here to help.
